
Introduction to Computer-aided Architectural Design
Lecture Topic: Basics of Photoshop
Contents
Basic commands
Photoshop (Adobe Photoshop(TM)) is a paint program. It allows a user to operate on pixels on the screen. The basic concept of Photoshop (and any other paint program) is to simulate a real painting environment, with brushes, canvases, palettes, etc.
Photoshop runs on both MacIntosh and Windows and behaves exactly the same.
To run the program simply place the cursor on top of the Photoshop icon and double-click.
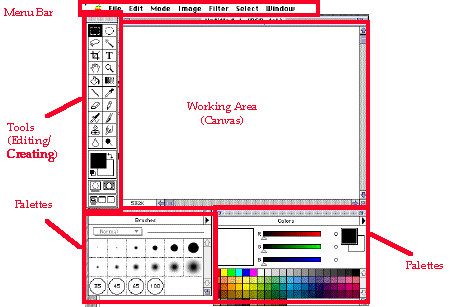
When started the user is presented with a menu bar (at the top), set of tools (on the left side), a canvas (the white area that occupies most of the screen) and little floating windows called palettes.

Creating an Image
To create a new image select New.. from the File menu. An options window appears requesting information such as the name to be called, the size, and color mode of the image. If the image will be gray select grayscale, if there will be color select RGB mode.
To open an image select Open... from the File menu. Select the file to open.
(there are different image formats that exist and they have to do with the way
information is stored in the image and the type of compresion used. the most
common formats are:
TIFF (Tagged-Image File Format) used to exchange image between different
applications
PICT (a Macintosh file format)
TGA or Targa (a DOS file format)
GIF (Graphics Interchange Format - a Compuserve format for sending
images over the network) and
JPEG (Joint Photographic Expert Group - a compressed format for sending
images over the network)
Normally, photoshop should open automatically any format file. If there is a problem manually choose the format of the picture)
To save an image file select the Save command in the File menu.
Tools
Once open and ready use any of the following tools:
Selecting:
The user can select an area using a standard shape, i.e. a
rectangle.

Selections can be also made on an arbitrary area using the lasso
tools

The lasso tool behaves like a polygon when the Alt key is pressed (on the keyboard)
The magic wand (
 )
selects areas on the basis of a color. If the magic wand is placed on top of a
red pixel, all the surrounding red pixels will be selected.
For all selections: the Shift key adds to the selection and the Ctrl key subtracts.


Duplicating
To create a copy of a selection use the copy and paste commands in the Edit menu.
(Select the area to duplicate. Select the Copy command from the Edit menu. Then select the Paste command from the Edit menu. The selection is copied and placed on top of the selected area. Move the selected area to a new position.)

Erasing
To erase a selection press the Del or Backspace key on the keyboard.
To erase an area from the canvas select the eraser tool (
 ).
This will paint the foreground with the background color.

Cropping
To crop an image use the crop tool
 and
select the area that is useful. Then press inside the selected area (the
cursor will look like a pair of scissors). The rest of the canvas will be
discarded.

Flipping (a.k.a. mirror or reflect)
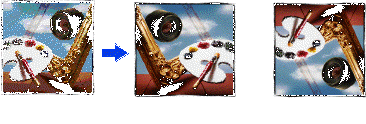
To flip an image (or a selected area) choose the Flip command in the Image menu.
Scale
To scale an image (or a selected area) choose Scale from the Image menu.
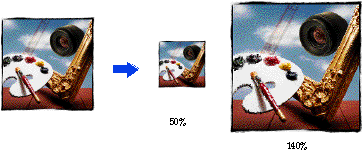
Notice: when scaled out an image does not give any more information. It is the same image but the pixels are bigger. Reversely, when scaled down the image loses information.
Rotate
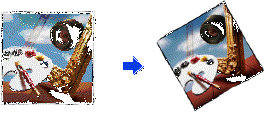
To rotate an image (or a selected area) choose Rotate from the Image menu. There are several choices such as 90 degrees clockwise, or arbitrary angle rotation.
Filters
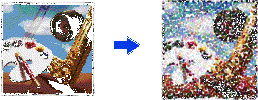
To change the appearance of the image (or a selected area) choose any filter from the Filter menu. Filters are operations on pixels that change the color value of the pixel or its surrounding pixels. They can produce dramatic results such as a whirpool or an impressionistic effect.
Area Fill
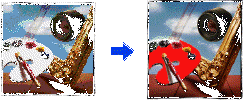
To fill a selected area click on the bucket tool (
 ).
This will fill all the selected area with the current color.
To change the opacity of the filling color select the opacity slide-bar in the brushes palette window (to get that window select Palettes in the Windows menu)
Eyedropper
The eyedropper tool
 returns
the value of a selected color.
Line
 ,
pencil
 ,
brush
 ,
and airbrush
 .
.
These tools simulate a real line, pencil, brush, or airbrush. Simply select the approprite tool and then place the cursor on the canvas and press the mouse while moving (this is called dragging).
To change the size of the brush select any size from the bruses palette.

To change the opacity of the filling color select the opacity slide-bar in the brushes palette window (to get that window select Palettes in the Windows menu)

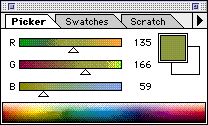
To select a different color use the picker palette window (to get that window select Palettes in the Windows menu)
To produce special effects use the smudge
 ,
Blur
 ,
and Burn
 tools.
Text
To add text select the text tool
 .
Then place tyhe cursor on the canvas and press the mouse button. A window
with options will appear. Make the proper selections.
Image Size...
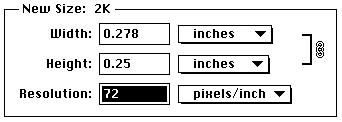
The Image Size selection in the Image menu allows the user to specify the actual size of the image in inches (or pixels). If the image is bigger than the piece of paper it will be printed on the size width or height need to be chganged. The locked proportions will preserve the x by y proportions of the image.
Canvas Size...
The Canvas Size in the Image menu affect the size of the background canvas. The canvas size does not change the size of the image, it only adds more canvas space.
Mixing Images
To mix two images into one follow the steps.
Open both images using the Open command in the File Menu. Go to image A and select the area or the whole image. Then select Copy from the Edit menu.
Goto image B and select Paste from the Edit menu. The selection from image A will be placed on top of image B.
Open the Layers command from the Palettes in the Windows menu.
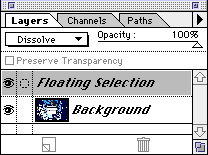
Select dissolve and use the slide bar to control the opacity of the image A over image B.
When Done
To save an image file select the Save command in the File menu.
P.S. DO NOT FORGET:
An image makes sense to humans because it represents something from the real world, but for the computer it is just a collection of pixels. Therefore, a line is just neighboring pixels that form the shape of a line and do not have a "line" identity. If any point on the line is selected it will affect only the one pixel selected and not the whole line.
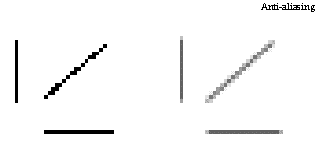
Since the computer screen is a grid of pixels, to avoid the jagging of diagonal lines a technique called anti-aliasing is used. When two pixels with different colors are neighboring their color is changed to the average of the two colors. This effect produces a smooth transition from one color to another.
